

Step-by-step guide on how to create a market in Polkamarkets.
POLK holders are able to create markets and are essential users of the Polkamarkets Protocol.
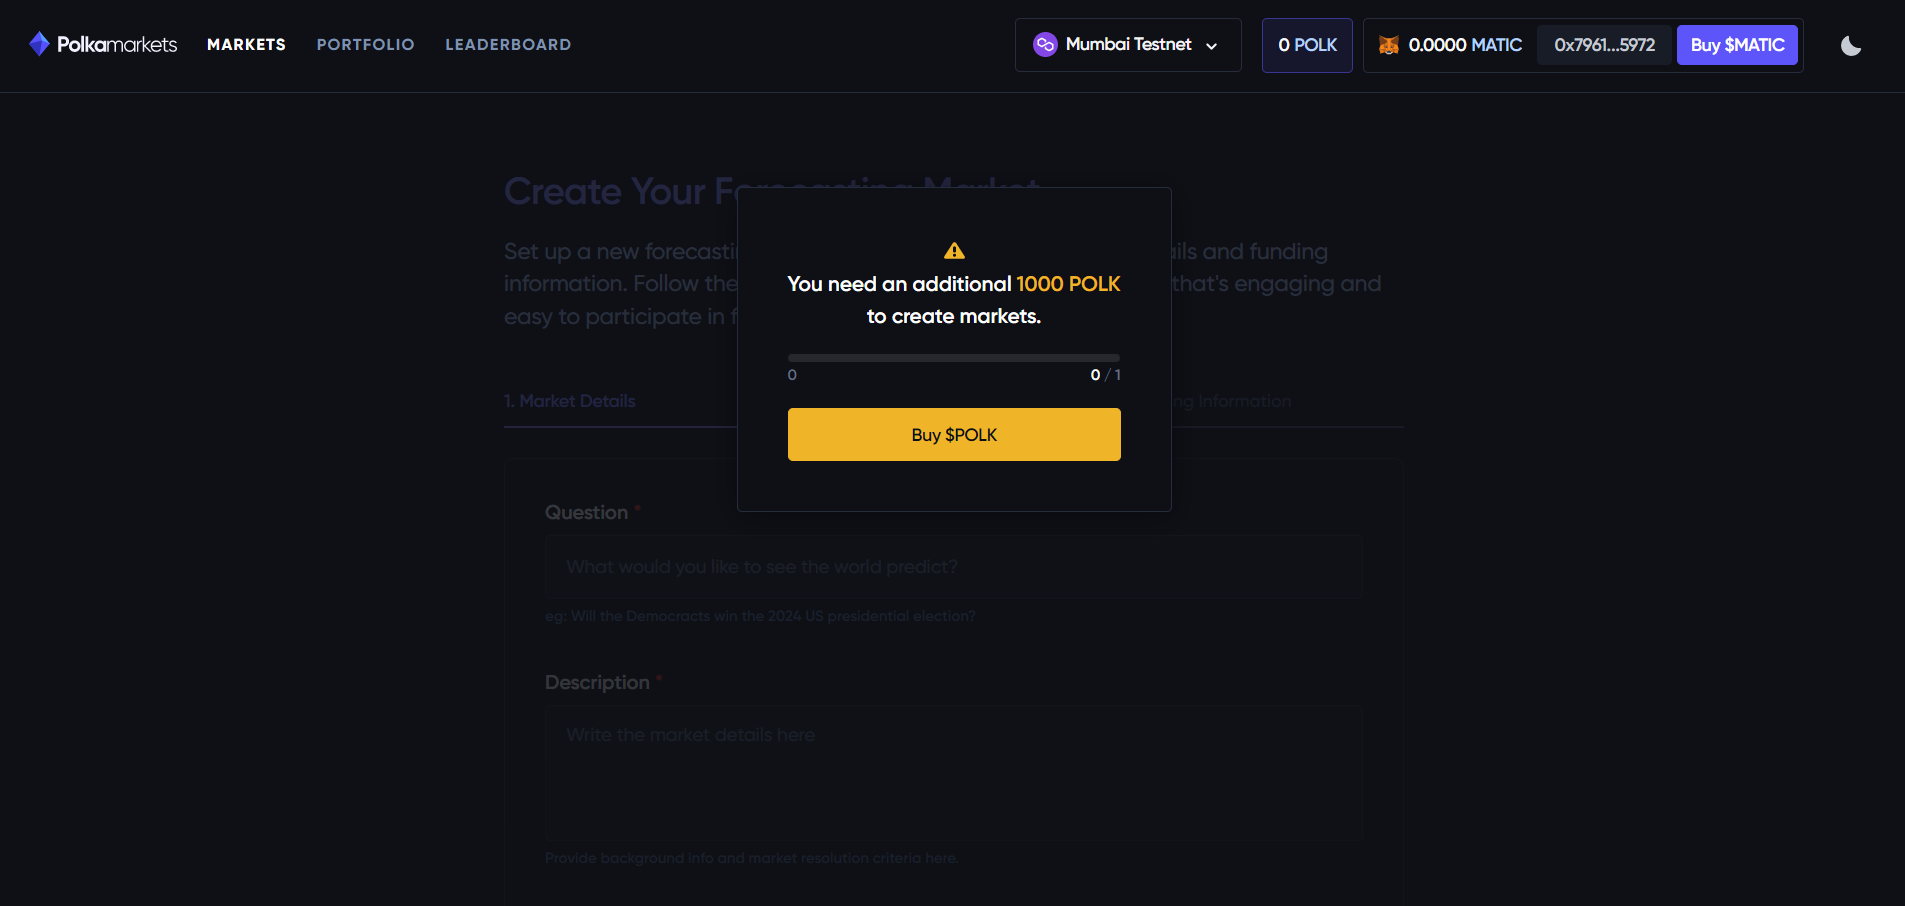
The minimum balance you'll need to hold in your wallet is 1,000 POLK. This amount will not be deducted from your balance when creating a market.
Before you proceed, get acquainted with the Market Curation Guidelines to make sure you create a prediction market that is likely to be upvoted by other Polkamarkets users.
How to create a Prediction Market
Step 0: Decide the network on which you'll create your Market
You can create your market on either Moonbeam, Moonriver or Polygon. Make sure you connect your MetaMask to the right network before continuing.
Step 1: Get POLK on Moonriver, Moonbeam or Polygon
To create a Prediction Market, you'll need at least 1,000 POLK in your wallet.
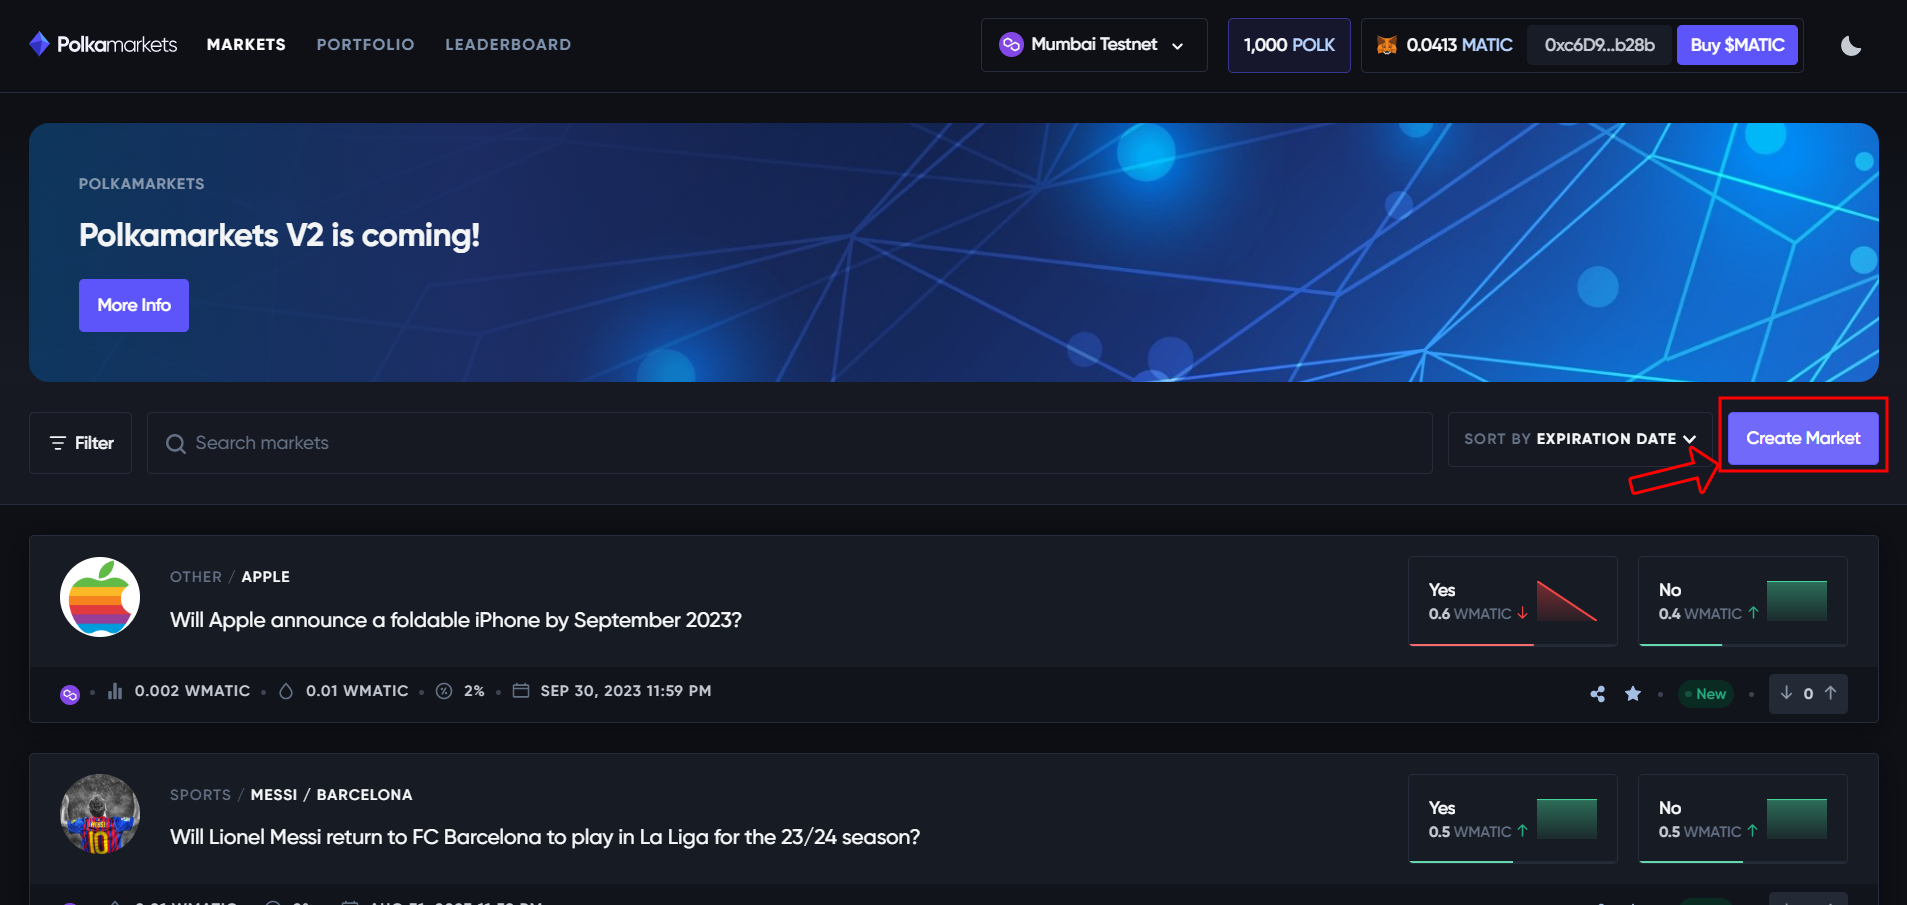
Step 2: Navigate to the “Create Market” page.
Head to the “Create Market” page. You can navigate there by clicking “Create Market” on the top right corner (see image below), or by browsing the following URL: https://app.polkamarkets.com/market/create
You’ll be prompted with the following message if you do not have enough POLK in your balance. To solve it, head back to step 1 to get POLK in your wallet.
Step 3: Fill in Market details as your first step to market creation
Fill out the form with market details — Question, Description (must be at least 100 characters long), Category, Subcategory, Resolution Source (URL), Closing Date, and Image Thumbnail. All the fields are required.
Note: The number of outcomes is 2 by default and its probabilities are set to start at 50%-50%. However, you can set different initial probabilities, as well as having more than two outcomes.

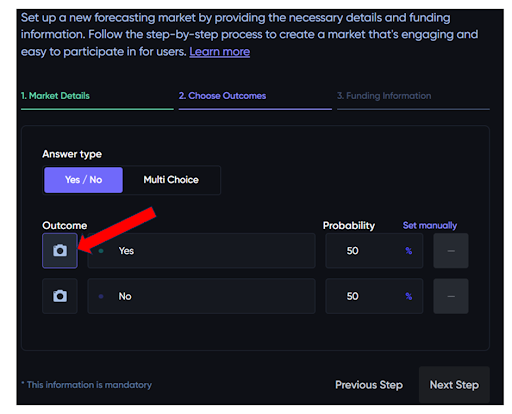
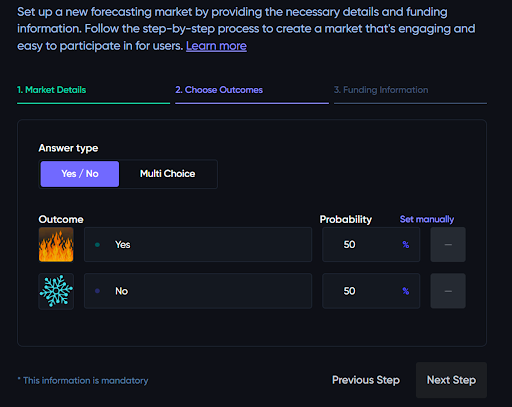
Step 4: Define the outcomes of your market
You can either choose a simple binary outcomes (Yes or No, This or That), or you can define multiple choices up to 32 different outcomes. You can also set the outcomes initial probabilities manually or uniformly. If set uniformly, when adding different outcomes the probabilities will be calculated automatically.
Optionally, you can add images to better illustrate the outcomes and make the market more appealing to traders. To do this, click on the outcome box and upload a picture from your device.
Step 5: Setup Funding Information
As the market creator, you’ll need to add liquidity to the market so trading of outcomes is possible for other users. Use the input to set up the liquidity you want to fund the market with.
You’ll have to choose the market’s Network (Chain) and the Token that will be used on that specific market.
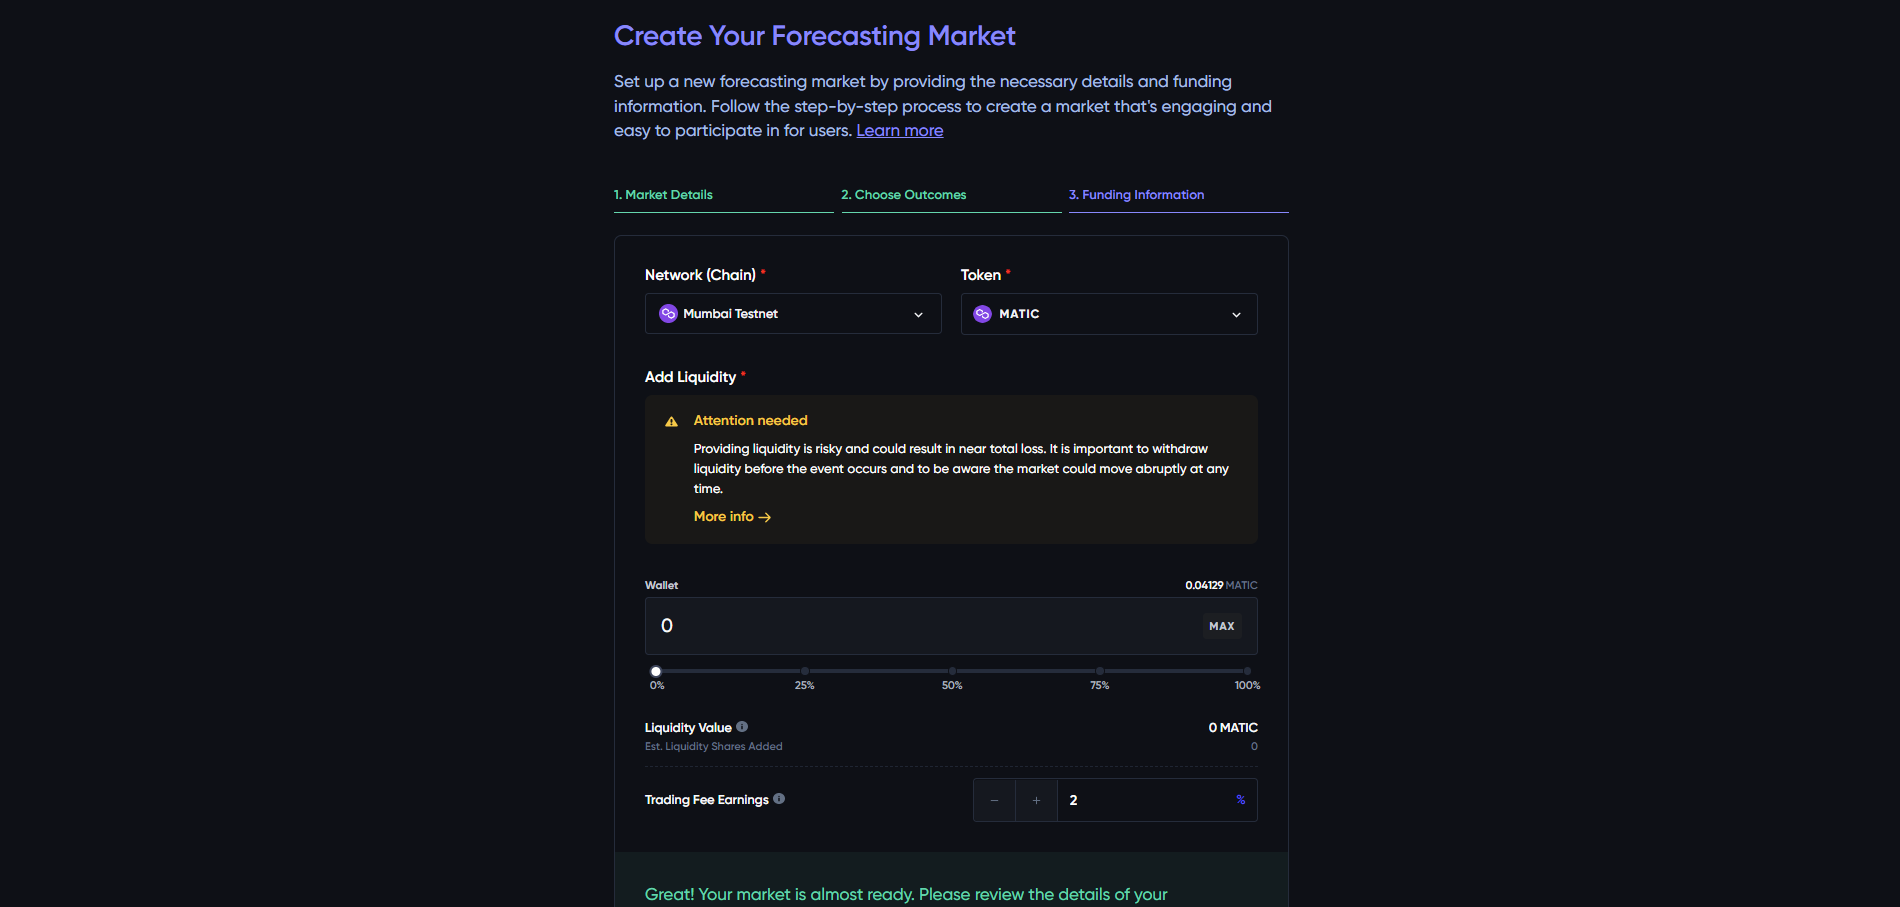
You’ll also need to set the Trading Fee Earnings. This is the fee given to liquidity providers on every buy/sell transactions.
Step 6: Review market data and confirm the transaction.
Click on “Create Market”. Ensure all the input fields are filled, otherwise, you’ll get an error message. Proceed to confirm the transaction on Metamask. You’ll be prompted with a transaction value equal to the amount of liquidity setup for that market.
Step 7: Market is created and ready for trading 🎉
Important note: When creating a market, one must try de-risking either the market description or market resolution source as much as possible.
Here are some examples of resolution sources:
- Official governamental/intergovernmental organizations (eg: NATO) or scientific institutes (eg: CSM);
- Flashscore for sports events, media websites like WSJ for business and financial news, Yahoo Finance for stock prices and indices, CoinGecko for cryptocurrencies;